I've moved The Cat to a different machine. It's no longer on a Hoojum (nee. Netbox) Cubit 2, but now on a (fairly old) P3 based DNUK Slim-PC. Trouble is, that machine is really noisy. I spent a few hours getting it to shut the hell up.
<--break-->
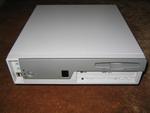
I bought the DNUK machine a couple of years ago as a decent desktop machine that wasn't so huge it'd take over my entire flat. The Slim-PC (model MS-6215) is really good in this regard - it's very small, and can be stood verically or horizontally. There are some updated models on the MSI website, but mine looks like this (click the pics for a closer look):
The machine is a P3 based beasty, and incredibly noisy. They must have used the most rattly, most vibration prone, least well designed moving parts they could find. All the fans make loads of air noise, and the supplied disk is relatively noisy too. As you'd probably expect, the CDROM sounds more like a washing machine than a computer component.
I purchased the following to sort this beasty out:
- 200GB Western Digital Caviar disk
- LiteOn SOHW832S 8x Dual Layer DVD-RW
- Akasa 350 1U Copper Cooler
- SilenX 60mm 12 dBA Fan
- PaxMate Acoustic Material (Standard Pack)
- ADDA 40mm 12V Quiet Fan
- 40 mm Chrome Finish Fan Grill
(phew - quite a bit! But, it grows the disk from 40GB to 200GB, and gives me DVD/CD writing capability, as well as some peace and quiet!)
A little note about quiet components...
Firstly, I'd have preferred to buy a Seagate Barracuda disk, but Kustom PCs don't sell them, and I didn't fancy paying another load of delivery costs somewhere else. As it turns out, the Western Digital Caviar is nearly slient, so actually worked out very well in the end. Also, who the hell are Lite On? I dunno, but I figured I'd take a chance on them because the drive was cheap and in stock. Again, getting something a bit more "known" from elsewhere would have incurred more delivery cost.
Something many people don't realise is that their case is actually generating much of the noise from their PC. The sides of the case tend to "rattle" or vibrate with moving parts such as fans and disks. So, even though a disk is quiet, the case might not be. The acoustic material is really good for this - it stops sound "bouncing" around the case, and also reduces case vibration. Also, many case manufacturers punch holes in the case and call that "a fan guard". These are generally a bad idea - they're really un-aerodynamic, and so create turbulence in the airflow. All this adds up to more wind noise from a fan. Wire grilles are probably your best bet.
Okay, so the Slim-PC then. Well, it has stupid fan guards, even where they're not really needed. The case is a generally bad design, with a "chassis fan" pointing forward, whilst the PSU fan points backwards. This effectively means the two fans oppose each other - resulting in more wind noise as air is sucked backwards through the moving fan. Unfortunately, not much you can do about this, because the Slim-PCs small size means space if so tight, you can't get any other fans in there (unless you fancy cutting holes in the top of the case?).
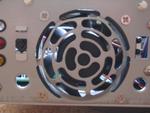
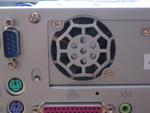
Here are the two fan guards, front (with the plasic bezel removed) and rear:
A little hacking about with the Dremmel soon got the punched guards off. I replaced the power supply guard with a 40MM wire grille, although I had to cut two of the screw arms off, because the Slim-PC only has two fan screws. I didn't do anything about the front guard, as the bezel completely covers the fan anyway. Here they are after that surgery:
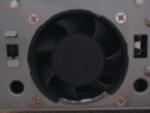 Front Fan Grill (Removed)
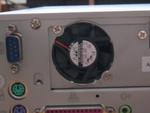 PSU Fan Grille (Removed)
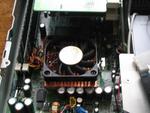
The next job was the CPU cooler. In the original machine, this is the single noisiest component. Here it is:
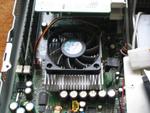 Original CPU Cooler
I replaced the cooler with a more modern one, which was rated for faster CPUs than the one in the machine. My thinking being that I could add a resistor to the fan to reduce it's speed and therefore make it much quieter. Handily, the 60mm SilenX fan comes with a resistor, so I used that. Here's the new cooler in place:
The replacement is also (naturally) quite noisy, possibly not a lot better than the original. However, with the resistor it quickly becomes very quiet indeed. Certainly, about as good as you could expect. The space is so limited around the CPU that there's no way to use any more effecive or more ingenious cooler, so you're more or less lumbered with this sort of thing. Testing later shows that the CPU stays at a sensible temperature, and doesn't seem to be any different with a new cooler and a slower fan.
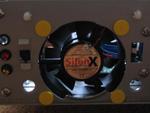
The next job was to replace the chassis fan. Actually, this original component wasn't too bad. However, the SilenX is specifically designed to be quiet, and comes with rubber vibration reducing mounts to replace the screws. Here it is, fitted:
The rubber mounts mean that the fan can "wobble" around in it's mount. This reduces vibration into the case, but does mean that the fan can touch the bottom face of the case. Clearly, this isn't a good idea, as that's bound to make loads of noise. I alleviated this by glueing on a strip of rubber (which I cut from an old bicycle inner-tube). Now, the fan rests on a piece of rubber on the case, and is also rubber mounted to the front face of the case. Again, about as good as it's going to get, I think. Getting the fan powered was a bit strange. I couldn't get it to work off the motherboard's chassis fan connector, so had to use one of those "inline" connectors on the hard drive power cable (handily all supplied with the fan). The chassis fan used to have a fan sensor, which obviously isn't present anymore. The BIOS reports this, but doesn't prevent booting or anything.
Testing shows the replacement fan is actually very quiet indeed. It seems to move more air then before (partly due to the removal of the fan guard, I expect). I expect this fan could have a resistor added with no reduction in overal cooling of the system.
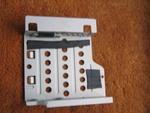
I used a bit more inner-tube rubber to mount the hard disk in it's cradle. This means the disk won't vibrate in the cradle, reducing rattly noises. The cradle itself fits quite snugly into the chassis, but being metal against metal, will vibrate horribly. I padded it out with small pieces of rubber, making it sit in position under some tension. This is a good thing, as it'll mean the metal won't be able to vibrate. Here's the drive cradle:
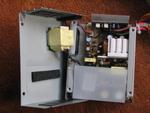
After all of that work, testing revealed that the power supply is incredibly noisy. Originally, I only bought things from KustomPCs, and put them in. The PSU was so noisy I had to buy more stuff from QuicklyShop (the 40mm fan and grille). Replacing the fan makes an enormous difference - I almost didn't believe the fan was spinning it was so quiet in comparison. It now moves a whole lot more air than before too, making it a candidate for a resistor, to make it even quieter still. Here's a picture of the PSU with the lid off (be careful opening any PSUs - they can hang on to very high voltages, even when disconnected):
In additon to all this, I put acoustic material anywhere I could fit it. The bottom face of the power supply and down the sides of it (around the air vent slots), and even inside it are all prime spots to reduce noise. I also put material elsewhere in the case, just about anywhere that there was a flat surface that wasn't used for airflow or cooling. Any spare spaces aroundthe fans are obvious choices, as they're noise-makers (same for the harddisk, of course). Be careful using this stuff -it's a heat insulator, so can disrupt the cooling of components, so don't wrap things in it. However, putting it on the inside of the lid of the case is a good idea (taking care to put it in places where it won't stop the lid from closing!).
Acoustic material is really good stuff - I'd recommend it to anyone to stick inside their PC, even if you're not doing a full job of quietening your computer. It'll help no matter what, and it's really easy to use. My pack came as two small sheets, and two large sheets. I very nearly used all of one small sheet on this project! Loads left for other machines in the future...
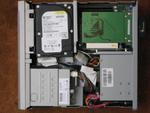
The last job, and by far the easiest is to tighten every screw and nut in the case. It doesn't matter what it's on, just tighten it. Anything working loose (even if you can't really see that it's working loose) will make noise. Tighten everything up, and it's less likely to make so much noise. Here's the finished product:
Conclusions
All in all, the project, my first journey into case modding,has been a success. This machine, out of the box, is incredibly noisy, and this work has reduced the noise very well. It's now sensible to leave on all the time, as it won't annoy the neighbours. If I make an order anywhere that sells them, I'll be buying a couple of resistors to slow down the chassis and PSU fans in the future to reduce the noise even further (provided the machine really doesn't get hot when it's used in ernest).
For your general sanity, I'd recommend this sort of thing to anyone. It's not difficult, and doesn't really need any special tools or skills. Cutting fan guards off is optional - good if you can do it, but don't worry if you can't. After that, all you need is a screwdriver and a pair of scissors. It's pretty satisfying too ;-)
PS. I must apologise for the utterly bad photography here - all the pictures are really blurry! I was in a bit of a hurry (wanting to get the machine running again), and not paying too much attention to what I was doing with the camera. Sorry 'bout that!
